
Detailing Stewart F7 A & B Units
I purchased these unit back in the beginning of the summer with the intent to have them completed for our "train-fest" in Charlotte North Carolina. Well that certainly didn't happen. The pictures I started with are after I had already installed the grab irons. I did take a few prior to that but seem to have mis-placed them. On all of the Stewart units there a dimple "marks" to start drilling out the holes to install the long grab railings for each door. There are also dimple "marks" for the grab irons on the nose, roof top eye bolts, above the front windows and sides of the pilot above the foot holes. This were all drilled out using a #78 drill bit. All of the long railing I made using .0015 thousands K&S wire. These can be a little tedious to make, I think it is either Detail Associates or Walthers that makes a detail kit for these units that include all of these items. Due to the cost and how many units I have, I opted to make my own.

The ladder grabs going up the one side of the unit are the most challenging. I will take a picture of another unit showing how I do this, unfortunately I didn't think to take a picture of that process. The "Central" started adding these to the units in the middle to late 50's. As you can tell in the pictures it really dress's up the locomotive.

I still need to add the stir-up at the bottom of the ladder between the pilot and truck. These are also a bit tricky, I'll make sure I go over that when I install them. I still need to add the number board numbers and detail paint the markers until I make a trip to my favorite hobby shop to get MV lens.

The "B" unit to this point only has the long grab railings and roof top eye bolts installed. I have installed the units road numbers on the side to this point.

Detailing a Bachmann RS3
I bid on a Bachmann RS3 unit also around the same time period as the F7's on eBay. It wasn't listed for much so I took a chance. It was one of those units that already had DCC installed in it. Initially all I did with it was to lightly "Dulcote" it to take the shine off. I took it to the Charlotte "train-fest" to try it out. Much to my surprise it also had sound, which really didn't sound that bad. Never the less the loco performed better than I anticipated so I wanted to dress it up a bit.

Part 1
The first thing I did was to remove the shell from the chassis, then I removed both the front and back end railings. Using a #5 mechanical pencil I drew in the lines that I needed for alignment purposes (once the holes a drilled I remove the lines with a damp cloth). I used a Atlas/Kato RS3 for reference on locating the grab iron placement. Once I test fit the grab irons I used ACC to hold them in place. After monkeying around with the grab irons that I had, the very next time I was at my favorite hobby shop I noticed they made grab irons specifacally for the RS3's, I beleive they were from Cal-scale. Boy that would have saved me a lot of time, I'll try and find out for sure and post it.
You will also notice that I installed Alco style lift rings and added a steam generator exhaust stack that were common on passenger locomotives. I also tried renumbering the loco with decals that I had. By your eye and a distance they didn't look too bad, but after taking this photo I realized it looked way out of place. So will be renumbering the whole number in the future.
2-8-2 #5185 Project
I'm currently working on a Athearn Genesis 2-8-2 light Mikado that I picked it up on ebay for a reasonable price. There were a few things I had to fix on it like the front pilot, that was damaged in shipping. In an attempt to find out a little bit more about the NYC's 2-8-2's I consulted my "New York Central Later Power" book. I discovered that the loco number was incorrect, (loco was custom painted). I removed the decals with mineral spirits and a cue tip, then I masked off the areas to be repainted. I wanted to start off with a good clean surface. I used "Testors" gloss black thinned 70/30, once the paint had dried for several hours I applied the new decals and let set overnight. Once dry I used "Walthers" Solvaset for setting the decals, when the initial coat has dried I popped any bubbles that might have formed. This is normal, don't freak out if you get them. You may have to do this step 1 or 2 times to get it right. I then typically spray over the area with "Testors" glosscote. This tends to help with silvering on the edges. Then I go spray over and beyond the area with "Testor's" dullcote to blend everything together. Unfortunately I didn't think to take pictures between the steps, don't worry I have another "Mike" to do. I'll make sure to take before and after shots.
I'm now in the process of weathering the loco. I first finished painting the drivers and side rods to get rid of the shinny silver stuff using the gloss black again. This time it was thinned almost 50/50, you want to add the paint in fine layers. I also have the loco running when I start to get close to the moving parts, this helps repel the paint away from those areas. Next I went over the loco with dullcote 50/50 to tone down the gloss black and blend all the areas together. Then I used a diluted mixture of "Floquil" Oxide Red 60/40 and applied it randomly around the loco where heat and the elements would have taken it's toll on the loco. On top of the smoke and fire box I used black chalk powder to simulate heat damage, as you can see in the photo's these areas were painted an "aged silver".


The next steps I will be appling oil spots and dusting on the running gear and side frames. Then I'll add the finishing touches with the marker lamps and detail parts. At some point I will exchange the plastic handrails with metal ones, and replace the ladder.
P&LE Baggage Car - Part 1
Well I'm in the process of slowly acquiring a fleet of passenger equipment. Todays models of passenger cars are much better than the old. However they come at a cost and not always in the road names you want. As most modelers know you don't have to have a fleet of all expensive equipment. In most cases if you salt and pepper in expensive and non-expensive models you can't necessarily tell the difference as the trains going by. Many of the guy's in the modular layout group that I belong to run trains this way, that's how I know. When I want to take picture of a certain scene I will place my better looking models (expensive) in the foreground.
The "Central" like many of the older roads had an extensive amount of head end equipment that they ran in the later days of passenger service. In fact most of the later day's were spent running more mail and express packages than paying patron's. In order to acquire a decent amount of head end equipment I'm purchasing relatively inexpensive cars that I will need to repaint and letter.
The car that I'm currently working on started out as a "Santa Fe" baggage car, again I won't cover the striping or painting process. I did get better photo's of the decals when they were first applied. You can clearly see the "silvering". Silvering is caused when there is air trapped behind the decal film, this is why it is so important to use a decal setting solution. This is one of the steps that make a huge difference between a good paint job and a bad one.

In the below photo the "P&LE" is barely visible due to the silvering. One of the other things that I do to help make these less expensive models look better is by adding scale grab iron and stir-ups. In some cases depending the model I will add grab irons around the doors as well. At some point I'll try and dress-up the area around the end doors, as you can tell by the photo below their rather plan. Remember it's all time!

One of the biggest challenges I've had is getting accurate information. I finally broke down and joined one of the "New York Central" historical society's. There a plenty of sites on the web to find info, but it's hard to uncover what I'm looking for.
P&LE Baggage Car - Part 2
I had to apply 2 and even 3 coats of "Solvaset" to get the decals to properly set on the model. There were a couple of bubbles that didn't seem to want to go away. When this happens use a very sharpe or new #11 xacto blade to help pop the bubbles. After letting the areas dry for a couple of days I initially applied Testors "Glosscote" over just the decals and then across the entire model. When this coat was dry I went over the entire model again using Testor's "Dulcote". In both cases I used a 60/40 mixture with laquir thinner.
For the finishing touches I added shades to the windows and also used my "Dulcote" mixture on the roof (the roof was in it's original black finish). All I have left to do is to lightly dry-brush the entire model.


Now all I need is about 8 more of these and I'll have just about enough of this type of car. At some point I will be modifying these into 4 wheel trucks.
U25b Project - Part 1
Back in the summer of 2013 I purchased this Stewart U25b loco custom painted for Conrail. The paint job wasn't that bad but I knew it was going to get repainted for the "central". I'm not going to get into the striping of the shell and repainting the loco. (As you can tell it's an incredibly difficult paint scheme to complete.) I still have some touch-up to perform on it but I can do that once I've installed the additional detail parts. So far the coupler lift bars and MU hoses have been installed. (I know, what are those blue things?)

Well I prefer to use extremely thin coated solid stran wire that you can get at Radio Shack. I like it because you can bend it into any configuration you want and they'll stay. I typically smash the ends to flare them out before I paint them. I also installed a pilot beam w/steps on both ends, they are Details West - P/N BP192.

This picture was taken at approximately the viewing distance you'd be at while operating the loco. You be the judge, once this is painted and weathered I doubt that most people will be able to tell the difference between the wire or after market detail parts. I not advocating that super detailing loco's is a waste of time, it's not. There comes a time when you have to decide whats important to you. After all it's all about time. For me this will be good enough for now, you can always come back later and make adjustments.

If you are going to have a large amount of loco's on your roster detailing them to the max will take time. If this what you like to do then go for it. My favorite part of the hobby is the scenery. That in itself takes up a lot of time.
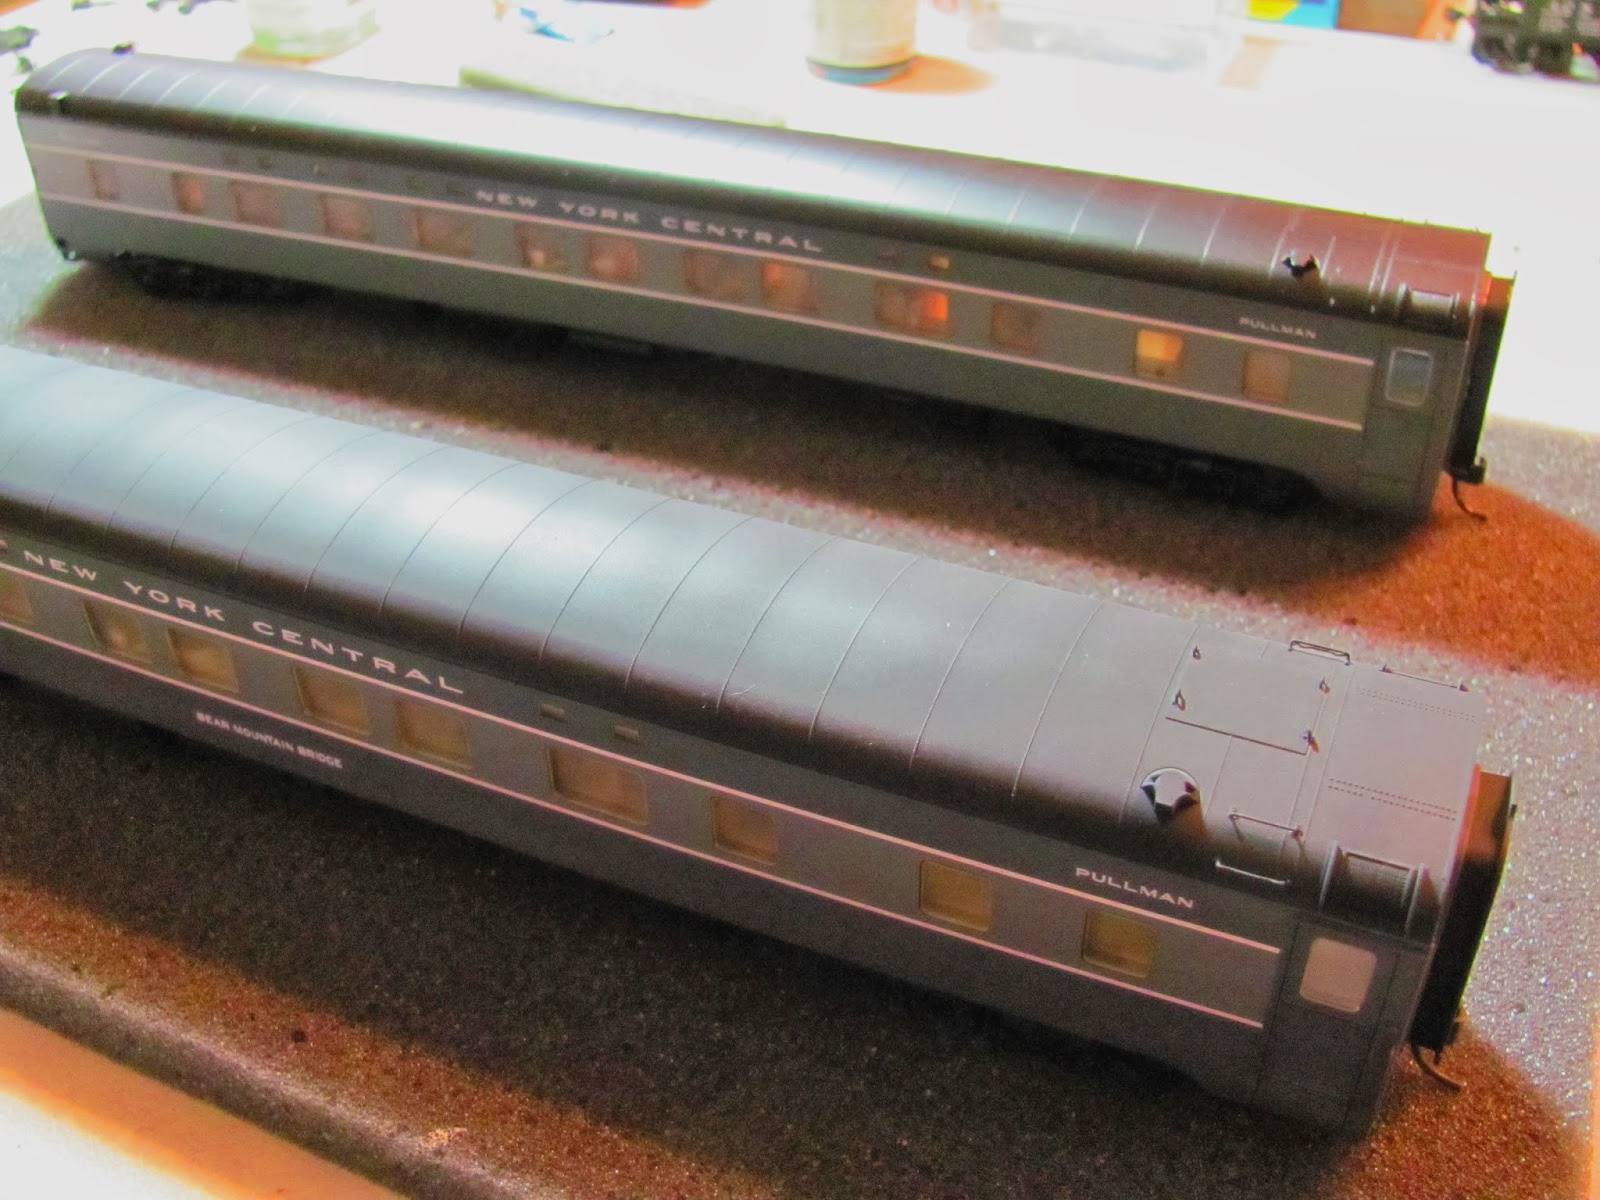
Detailing Walthers Passenger Cars
Over the past several months I have building my fleet of passenger equipment. One of the things that I noticed was many of the used cars I was purchasing on-line did not have the grabs installed. To me that makes the difference between a good looking car and a great looking car. The Walthers cars all come with added grabs for the modeler to install (inless you buy the more expensive cars with them factory installed). In most cases if you stick a plan Walthers car next to an Rivarossi , IHC or Concor car you almost can tell the difference until you add the detail parts.

The instructions for drilling the holes for the grab irons indicate that you need to use a #80 size bit. I only use this size bits to get the holes started, too many times I have broken bits because it's hard to keep them straight. I manually put the holes in with a pin vise. Once I have started all the holes I go back and finish drilling them out with a #76 bit. These tend to be more forgiving when drilling the holes without a breaking.

Before gluing in the grab irons I always dry test the parts to insure they fit properly in the hole. The way I install grab irons is by place a drop or two of super glue (ACC) to a scrap piece of styrene. I then hold the part with a flat face pair of angled pliers and run the ends of the grab irons through the glue. You want to see a small build-up of glue on each end, then place the grab iron in-place. This will also act as a filler to close up the holes.

Don't worry if you get a little bit of clue on the surface of your car that leaves a shinny spot. Go over the areas where you applied your grab irons with "Testors" Dulcote mixed 50/50. This will remove the shinny spots a blend the cars appearance together. Just look at the after photos with the grab irons applied, you be the judge. Viewed at a normal distance you won't even tell.

I know this isn't the best picture in the world, but you can clearly tell that the car with the applied parts looks 10X better than the one without.
This photo shows the two (2) different style of pin vises that I use for drilling holes. Some folks have asked me why I don't use a mini drill press, I have when doing many holes for a long period of time. However I still seem to break a lot of bits when doing this. Use what works for you.

No comments:
Post a Comment